This exploration is for all ages, as the colored smilies show. You can make a thermometer and barometer with your whole family together!


The thermometer and barometer experiments are from the Weather unit. Layers of Learning has hands-on experiments in every unit of this family friendly curriculum. Learn more about Layers of Learning.
Thermometers and barometers are used to record and predict the weather. A thermometer simply tells you if it is getting hotter or colder and how hot or cold it is. It works because the liquid in the thermometer expands as it heats. Since the liquid can only rise up the straw as it expands, we can read the temperate based on how far up the liquid has risen.
Barometers work to predict the weather because of changes in air pressure. High pressure and low pressure zones directly affect the kind of weather we’re having. High pressure usually means warm, clear weather. Low pressure brings stormy weather along with it. You can expect wind, rain, and clouds when we have low pressure.
Step 1: Library Research
Before you begin exploring, read a book or two about the weather. Here are some suggestions, but if you can’t find these, look for books at your library about weather, forecasting, thermometers, and barometers. The colored smilies above each book tell you what age level they’re recommended for.
As Amazon affiliates, the recommended books and products below kick back a tiny percentage of your purchase to us. It doesn’t affect your cost and it helps us run our website. We thank you!

What Will the Weather Be?
by Lynda DeWitt

Step 2: Homemade Thermometer Experiment
To make a thermometer you need:
- A clean, clear, empty water bottle
- A clear drinking straw
- Play-doh or clay
- Isopropyl alcohol
- Water
- A hair dryer (or tubs of very hot and very cold water)
- Red food coloring (optional, but it makes the liquid level more visible)
Start by filling the bottle halfway with water. Fill the remaining half with rubbing alcohol. We added red food dye at this point to dye the water and alcohol red so it would be more visible as the liquid level changed.
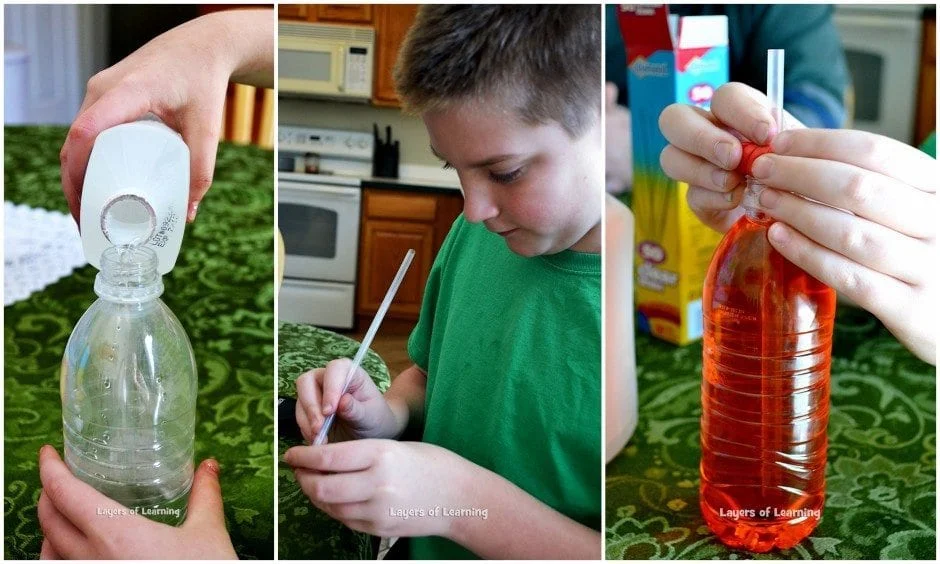
Use the clay to surround the straw and then press the clay on to the top of the bottle, completely sealing it so it’s airtight. Make sure the bottom of the straw is about an inch from the bottom of the bottle, allowing the red liquid to rise up it.
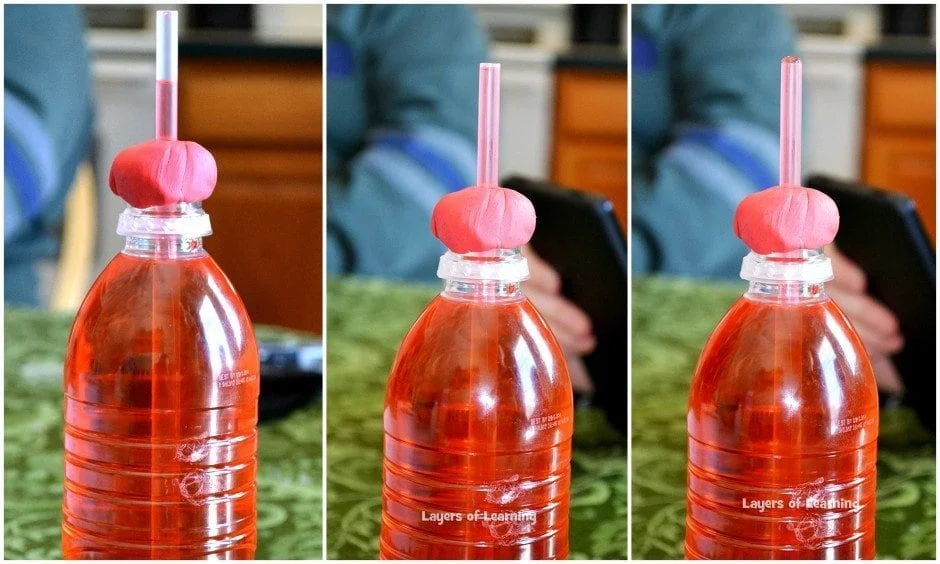
Now your thermometer is ready. We’ll apply heat to the liquid and watch the “mercury” (we don’t have mercury of course, just red dyed alcohol water, but it is acting as our mercury in this experiment). To apply heat you can just turn on your blow dryer and let it blow on the bottle for a few minutes, warming the liquid inside.
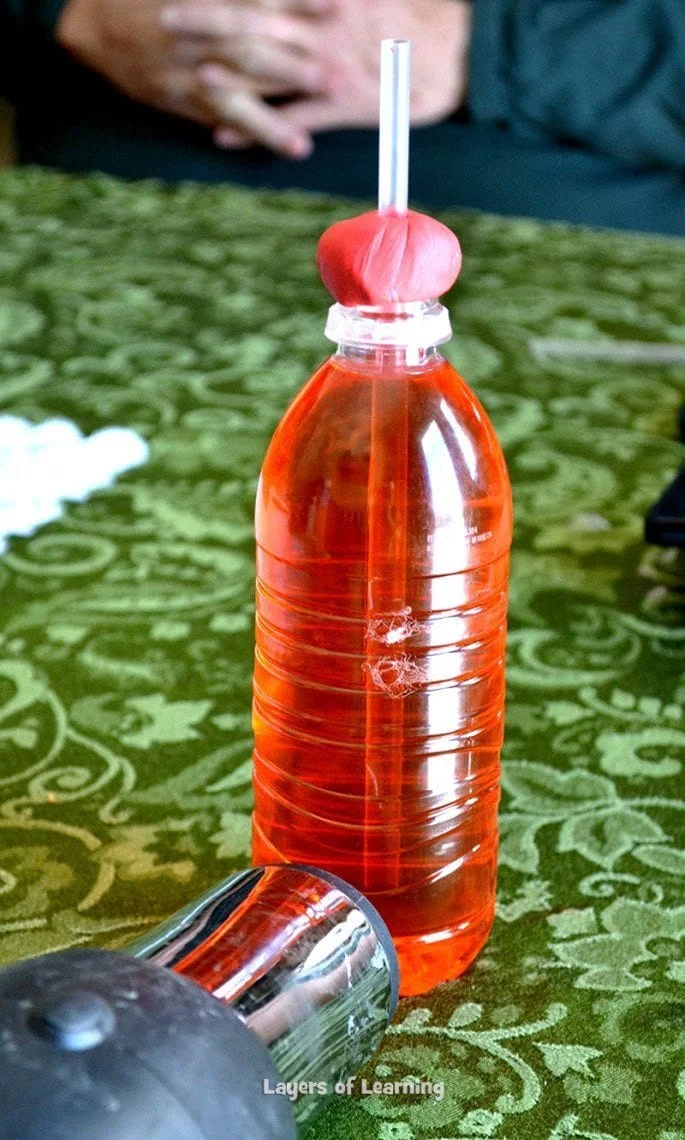
Alternately, you can place your water bottle thermometer into a tub of very hot water to heat it. (Afterwards you can put it into cold water to watch the liquid come back down the straw.)
As you heat the liquid, you will be able to watch it climb higher and higher up the straw with the increase in temperature.
Homemade Barometer Experiment
Gather these supplies: a wide-mouth mason jar, a balloon, a rubber band, a drinking straw, a file folder or strip of paper, white school glue, a pencil, and a straight pin (optional).
Cut the top (the narrow part you blow into) off the balloon. Stretch the remaining piece of the balloon over the mouth of the mason jar and secure it using the rubber band.
Glue one end of the straw to the center of the balloon, so it is sticking out parallel to the work surface. You may want to glue a straight pin on the opposite end of the straw if you want to have a point to measure with (makes the barometer readings more accurate).
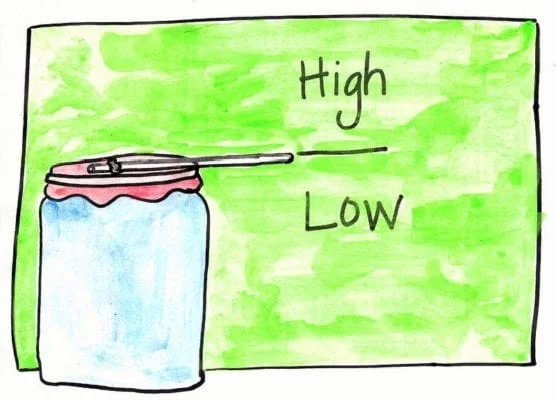
Now create a scale on the manila folder or on a strip of paper attached to the wall. (I use a manila folder because when partially open it stands alone.) Make a mark every centimeter on your scale. Have your numbering start at the bottom and progress upward along the folder. If you don’t want to be as exact you can just use the labels “high” and “low.”
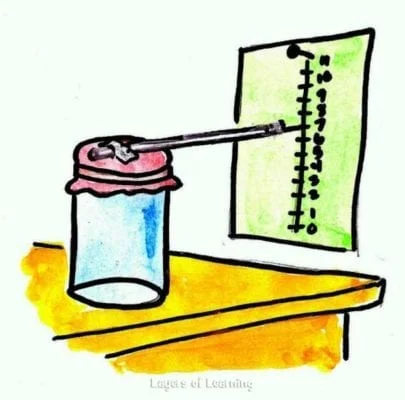
The barometer works best outside, but not in direct sunlight. You will see the straw move up and down as the weather changes. Record what you observe. What kind of weather do you see when your barometer indicates low pressure? High pressure?
When the air is pressing on the balloon’s surface, it forces the balloon down, making the tip of the straw rise higher. Likewise, when the pressure is low and not the pushing on the balloon, the straw falls lower.
Step 3: Show What You Know
Complete a lab report about how a thermometer works based on the thermometer experiment.
Keep track of your weather forecasts for two or three weeks during the unit. At the same time track what the actual weather does. Write up an explanation of how accurate your barometer was at predicting the weather.
Additional Layers
Additional Layers are extra activities you can do or tangents you can take off on. You will find them in the sidebars of each Layers of Learning unit. They are optional, so just choose what interests you.
Writer’s Notebook
Write weather poems. Choose a weather phenomenon to vividly describe.

You could also write one about the sky and expound on all the things that fall from the sky.
Additional Layer
Find out about other temperature scales besides the one most commonly used where you live. Fahrenheit decided on his own scale, but later Anders Celsius created another scale with the freezing point of water at zero degrees and the boiling point at 100 degrees. Lord Kelvin created the Kelvin scale even later than that, and also introduced the idea of absolute zero, or the point at which there is no heat present at all.
Additional Layer
Throughout Earth’s surface there are several zones that keep a pretty consistent pressure.

One of these is the low pressure zone along the equator. It stays low almost always, which means you can expect lots of rain there. There are several zones that maintain their pressure, and they are directly related to the trade winds. Create a map showing some of these consistent pressure areas.
Get a Free Unit
Choose between the first unit in each Layers of Learning subject to try for free when you sign up for the newsletter.
We never spam and you can cancel your subscription at any time.


This is amazing!
I can’t wait to try this with our kids.
I appreciate you sharing this.